
French Dip Nails: How To Achieve The Perfect French Dip Nails?
Looking to achieve a classic manicure style that speaks of silent confidence and power? These french dip nails can make you look and feel like a million bucks!
On Apr 3, 2023 – 10 minutes read
We’ve all been there- getting funky nail extensions only to realize they become boring quickly and may not suit every outfit for the next 2-3 weeks. Back in 2021, I remember going all out on my nail art only to realize how quickly they chip if you have a job that involves lots of typing (and a homely lifestyle that needs you to get hands-on)! Not only did my nail beds hurt, but the chipping color from the gel extensions made my hands look unpresentable. Learning from my growth curve in getting my nails done, the experience led me to the French tip dip nails.
If you haven’t explored the French dip powder nails trend yet, let me make it simpler for you. The 1970s brought us the stunning classic French manicure, which comprises a neat nude or sheer pale pink nail bed with white nail tips. While its popularity is still undeniable, the powder dip nail trend adapted to give us an even more beautiful version of it, which is the look you’ll see on so many TikToks. Looking to achieve a classic manicure style that speaks of silent confidence and power? These nails can make you look and feel like a million bucks!
Today, I’ll teach you how to get the ideal french dip nails. This article also includes delicious dip French manicure ideas to avoid typical mistakes.
What Are French Dip Nails?
To start with, the french dip nails, also known as “dipped nails” or “dip powder nails”, are a popular nail trend that involves applying a colored powder to the nails to create a natural-looking manicure. They have gained quite a fan following among busy individuals due to their easy application and long-lasting durability. Understated and natural, this elegant style can complement any event and occasion, which also is quite easy on your pocket and aesthetically appealing.
You’ll see a lot of variations of it in 2023, like the alien french dip tips that Anne Hathaway showed off at a recent fashion show. Other appealing forms of tip dip styles include the ombre french dip nails that Gen-Z is raving about. If you wish to know what this style is and how it can be recreated at home, hang tight- I’ll cover it extensively in a minute!
Before we move to the “how”, let’s understand why did the good-old French manicure turn into powder dip nails?
The search for a more practical and long-lasting solution led to french dip nails. Convenient, low-maintenance cosmetic treatments are in demand as women’s lifestyles get busier.
french dip nails offer a natural, long-lasting, and low-maintenance choice for women who want glossy, attractive nails. They’re also more durable than nail paint and extensions. Dip powders let you sample different French tips without hiring a nail professional.
How To Give Yourself French Dip Nails At Home?
With our DIY tutorial, you’ll be able to achieve flawless French tip nails minus the mess and confusion. With the correct equipment and steps, you’ll be a pro in no time!
Before you get started with your DIY routine, here’s what you’ll need:
- Nail clippers, buffer, filer, and cuticle pusher
- Brushes and applicators for the dip powder
- Nail dehydrator (or bond) to remove any excess oils from the nails
- Base coat to ensure the dip powder sticks evenly
- An activator to help the powder cure without UV light
- A sealer or gel-top coat to lock in the final look.
- A dip powder in a sheer nude or light pink shade
- A white dip powder for the French tips.
- Clear powder for nail encapsulation.
- A French manicure dip tray and a small dish for easy application.
- Cuticle oil for nourishment.
If you’re new to powder-dipped nails, try using a french manicure dip powder kit first. These kits have every product that you’ll need rather than you having to buy each product individually.
DIY French Dip Nails
While giving yourself a French dip manicure, attend to one nail at a time after you’re prepped. The process requires patience, deft handiwork, and precision. However, try not to let your logical mind overthink every step. The process may not look like much, but the result is worth it! In short, trust the process and your creativity to shine through.
Preparation For French Dip Nails
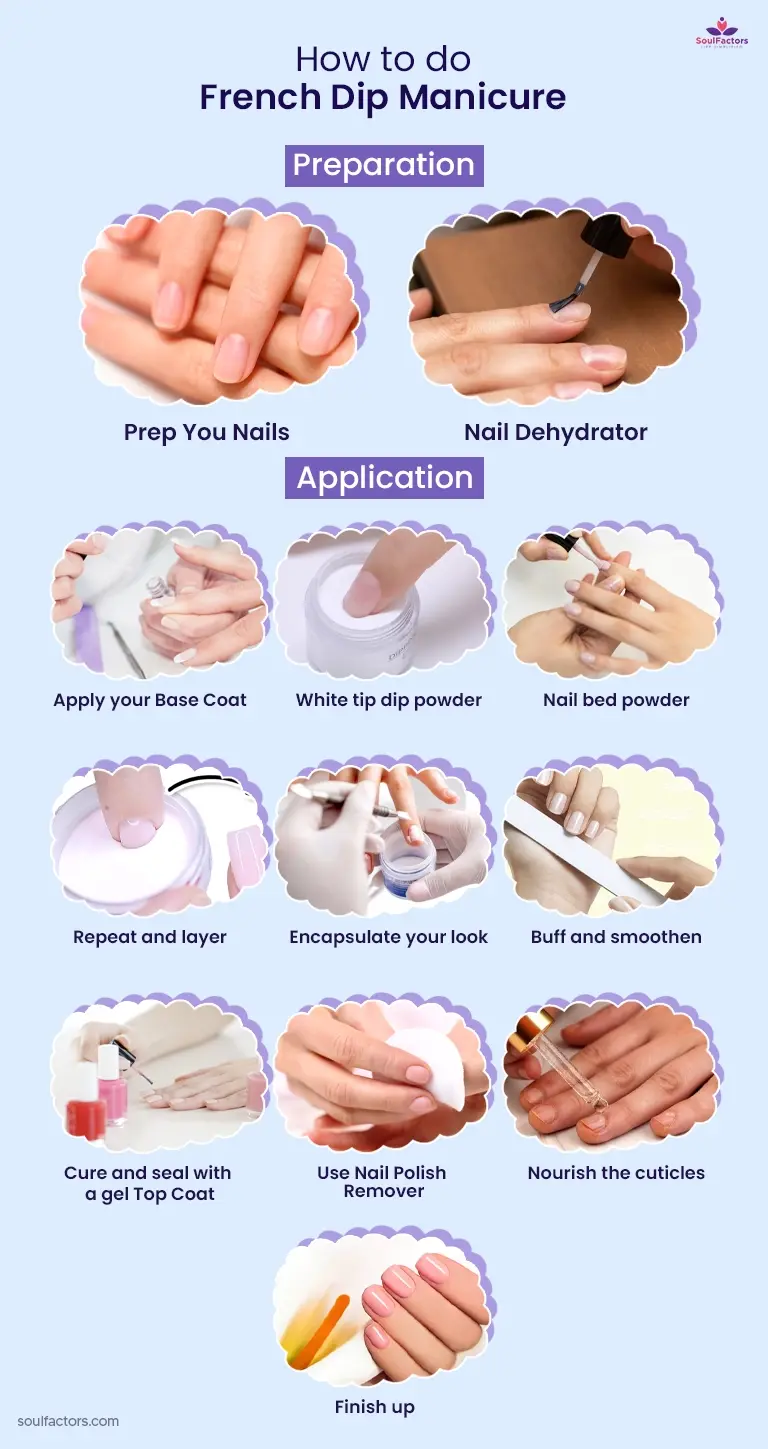
- Prep You Nails: If you’re trying French dip tips on natural nails, clip and buff your nails to start with a blank canvas.
- Nail Dehydrator: On buffed and prepped nails, add a layer of nail dehydrator to remove any excess oils that may cause clumpy bonding of the powder.
Expert Tip: While the dehydrator is doing its job, take the dip manicure tray and put some of the white tip powder into it. This will save time and product while making the best of a wet base coat.
Application Process Of DIY Dip Nails
- Apply your Base Coat: Start with one finger and apply a layer of base coat evenly in three swipes starting from the middle, and then moving to the left and right corners of your nail.
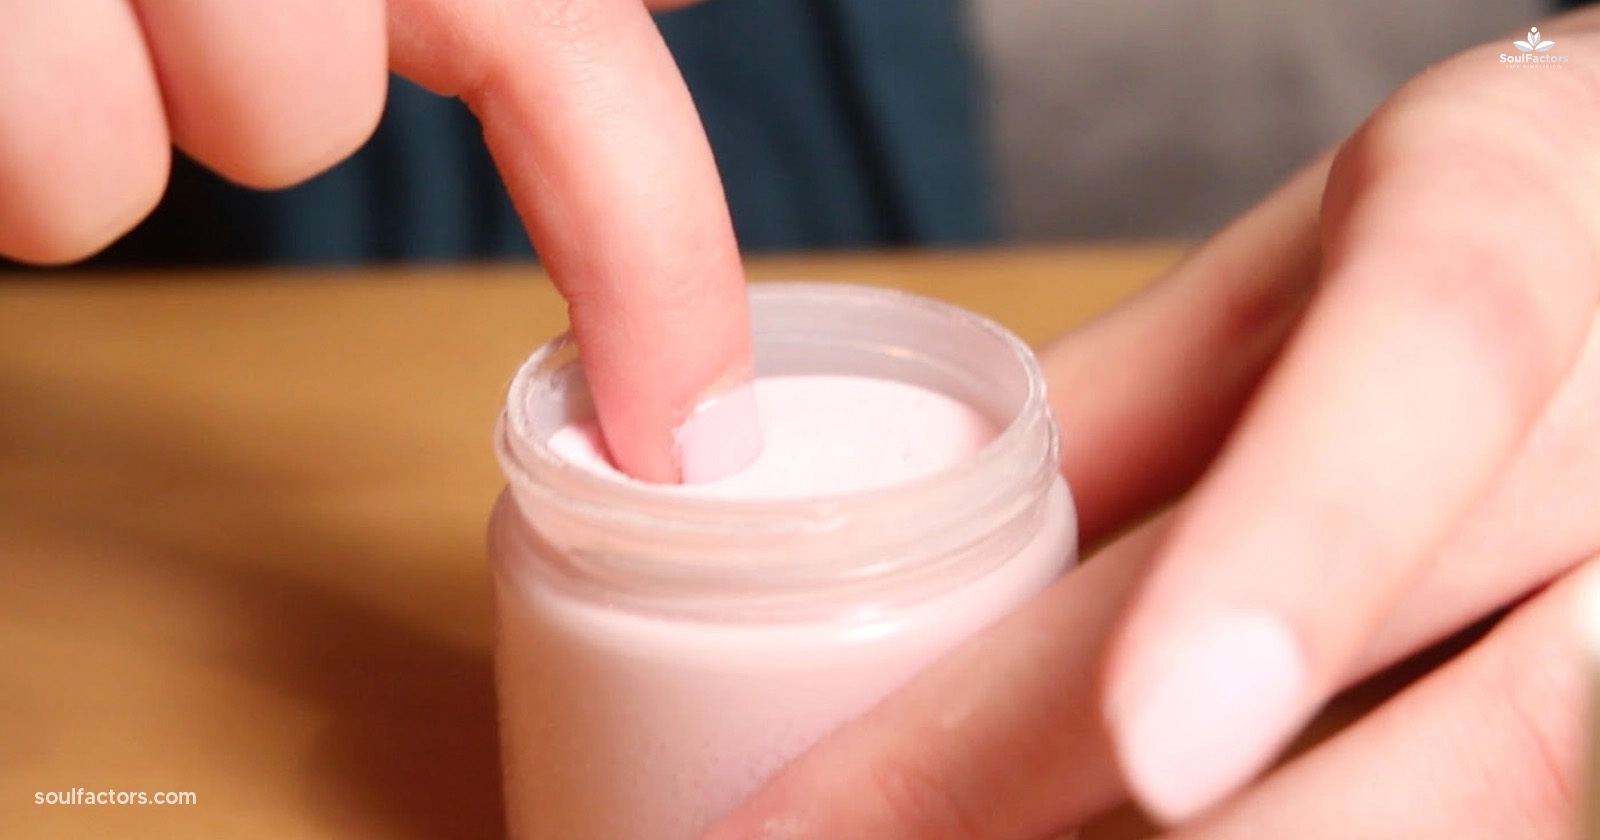
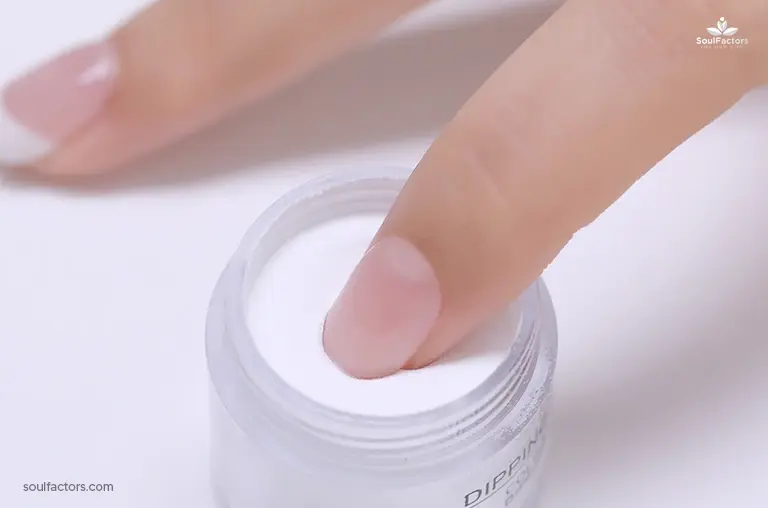
- White tip dip powder: Working quickly on the wet base coat, dip the tip of your nail into the French manicure dip tray with white powder. Cover only up to the smile line on your natural nails to get the French tip look. Tap off any excess product.
- Nail bed powder: While the base coat on the nail bed is still wet, scoop some of the pink or nude powder you selected and pour it evenly on your nail. Avoid the french tip so that you don’t get any stray granules.
- Repeat and layer: Once you get the first nail done, move with the rest of them before giving yourself a second layer of base coat and powder. Make sure that the white tip powder aligns perfectly with the first layer to ensure maximum opacity and neatness.
Expert tip: The base coat tends to dry quickly, so try to work with time. Starting with the white tip first will ensure you don’t double-coat the nails. As you will be working in two layers, it’s okay if the first one does not cover the entire nail bed.
Clear Encapsulation And Finishing Up:
- Encapsulate your look: When you finish both layers, use a thin third coat of base and dip your finger gently into the clear powder to encapsulate the nails.
- Buff and smoothen: If you have made any clumpy mistakes, here’s your chance to redeem your nails. On dried nails, take a nail buff to gently smoothen the surface and edges without taking too much product away. Dust off any residue with a brush.
- Cure and seal with a gel Top Coat: Finish up with a good-quality gel top coat to cure the powder. A top coat will also seal in the color to protect your freshly dipped nails.
- Use Nail Polish Remover: To clean up any messy edges around the cuticle, take some nail polish remover and cotton Q-tips.
- Nourish the cuticles: Once you’re satisfied with the final look, take some cuticle oil and apply it around the cuticles for deep nourishment.
- Finish up: We believe in minimal wastage, so pour back any excessive nail dip powder back into the container (considering it’s not damp or clumpy).
Expert Tip: French nail tips are not only vanilla, so feel free to use your creativity. If you have the experience, feel free to experience it with multiple colors and textures, such as ombre French dip nails, French dip nails with glitter, colored nail beds, and more. When in doubt, there’s a tutorial available for everything!
Common Mistakes To Avoid
To get the best possible results, here’s what you should avoid:
- Not prepping the nails well: If your nails are not shaped, buffed, or primed well, you may not achieve the desired results.
- Improper base coat: applying too thick a layer of base coat or taking too much time to apply powder after applying the base coat will give your nails a clumpy look.
- Overthinking your application: The more you think, the more likely you are to mess up! Enjoy the process and consider these trials and errors as practice. Rome wasn’t built in a day!
French Dip Nails Vs Acrylic Nails
Many readers wonder about the difference between French dip nails and acrylics. While both are different methods, both have their pros and cons.
Addressing the positives first, French dip nails are chemical-free and an easy look to achieve. They’ll last you about a month if you look after them well. Moreover, these are the perfect way to preserve the health of your natural nails and nail bed without causing damage while removing them. They need no UV lights to cure, which keeps you safe from the risks of skin cancer. On the other hand, these may not be as strong as other curing techniques, which may lead to chipping and cracking. If your nail beds are weak, the layers may add quite some pressure and cause soreness while bonding.
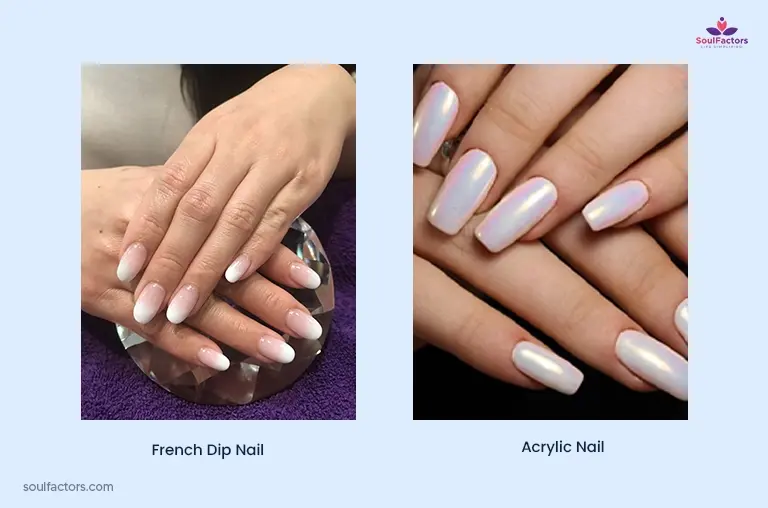
The pros of acrylic nails are aplenty, starting with their durability. They are tough and not easily damaged, lasting about 2-3 weeks. These are a great choice for those with poorly structured or non-existent nails. If you keep up with your refilling appointments, it can be quite easy to maintain. However, using chemicals may cause an unpleasant experience and weaken the natural nail bed(1), which is why your nails may feel sensitive and brittle after a removal. Also, getting acrylic nails is tricky which doesn’t fit the DIY bill, and hence can be an expensive trip to the salon!
Both methods are not one-size-fits-all. If you lead a busy lifestyle with no time to maintain long and designer nails, acrylic nails are not for you. Try the French dip on short, natural nails and you’ll be delighted for life! On the other hand, if you don’t have a lot of manual work and love to give nail care its due time, you can try and maintain acrylics.
Maintenance And Removal
- Look after the cuticles: Dry cuticles can accelerate the peeling or cracking of the dip powder. To ensure your cuticles are moisturized at all times, use an oil or cream regularly.
- Avoid using your nails as tools: Try not to use your nails to wash the dishes, chemically clean the house, open cans, or scrape off stickers as it may damage the dip powder. Use proper tools instead!
- Avoid hot water: Hot water can weaken the bond between the layers of powder, base, and activator. Don’t submerge your hands in hot water for long times, or wear gloves if necessary.
- Use a non-acetone nail polish remover: To remove the French nail dip after a few weeks, use a non-acetone nail polish remover. Acetone can weaken and damage your nails in the long run.
- Keep your nails short: Long nails can easily break and chip. Keep your natural nails short to avoid any damage to the dip powder.
French Dip Nails Cost
The cost of getting french dip nails from a specialist can range between $30 to $60 depending on the salon and location. The price may also vary depending on whether you want any additional embellishments and designs like the ombre look or use a high-end product. In comparison, traditional French manicures cost between $25 to $40 as it does not involve dip powder or any additional techniques. The most expensive of the lot is acrylic nails which can range from $50 to $85 or even more. Adding nail art, french tips, and embellishments may cost you $1 to $6 per nail or jewel, depending on the extensions, design, or add-ons like crystals and stencils.
At home, your french dip nails can be quite economical as you’d be only paying for the kit or products and not the labor.
Conclusion
While fashion trends may evolve time and again, we keep seeing the comeback of classic looks every few years. The French nails are one of the classiest looks of all time, which is why youngsters across generations come up with their renditions. While powder-dipped nails have been with us since the 1980s, the new and improved versions of it ensure that brittle and thin nails get the care they need with the least amount of stress. Not only is this method highly economical, but it is also easy to be your next DIY. Plus, the self-drying and curing will keep your skin healthy for a long time over UV lights. All in all, this is the best look for summer 2023 that I highly recommend our readers try at least once! For more tips on beauty and DIY, stay tuned to our next editorial!

Subscribe to Newsletter
Elevate your routine, stay on trend, and embrace a personalized beauty journey with our curated insights.


Samantha is a versatile and sought-after beauty guru. Her mastery extends to hair care, skin care and women’s lifestyle, while staying ahead of the ever-evolving trends.
Reviewer name
Reviewer bio

Write a Comment